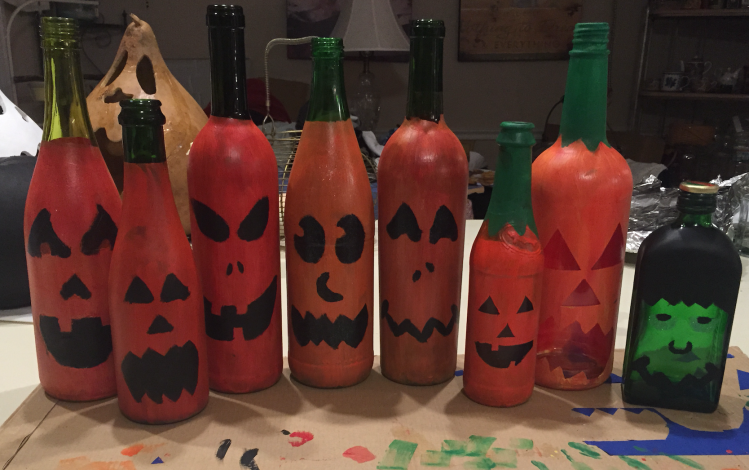
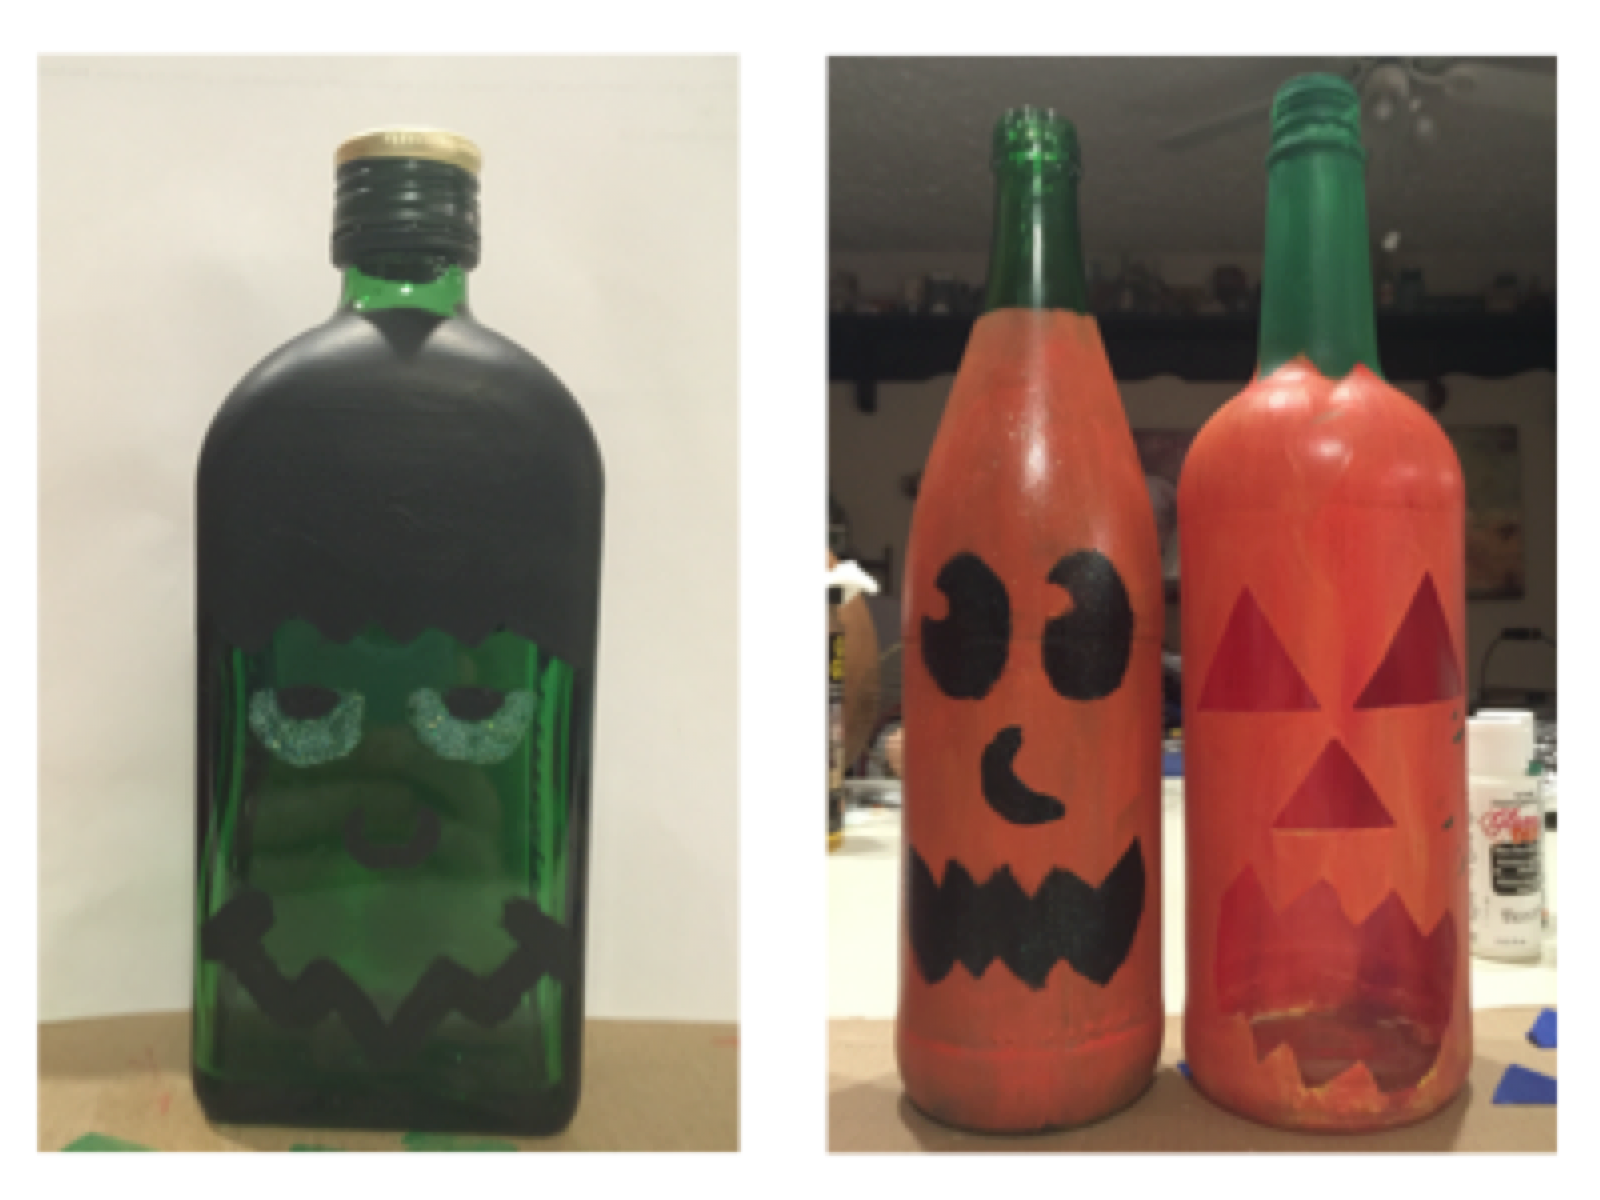
Last weekend we made homemade spaghetti sauce for canning and I found a fun way to combine my love for fall, acrylic paints, and wine.
While I didn’t drink the wine that came out of these bottles, I am sure that would have made this craft project a little more enjoyable. Scroll to the end if you are looking for step-by-step instructions.
The first thing you will need to do is gather a bunch of glass bottles (beer, wine, IBC root beer, whatever floats your boat). Soak these bottles in a sink with hot water and a little soap. This will help soften the labels and hopefully they will peel off in one piece. Find another way to occupy your time for at least a half hour. When you return to the check on the bottles you may find that you need to spin them and let the other side soak. Every bottle is different so your wait times will vary.
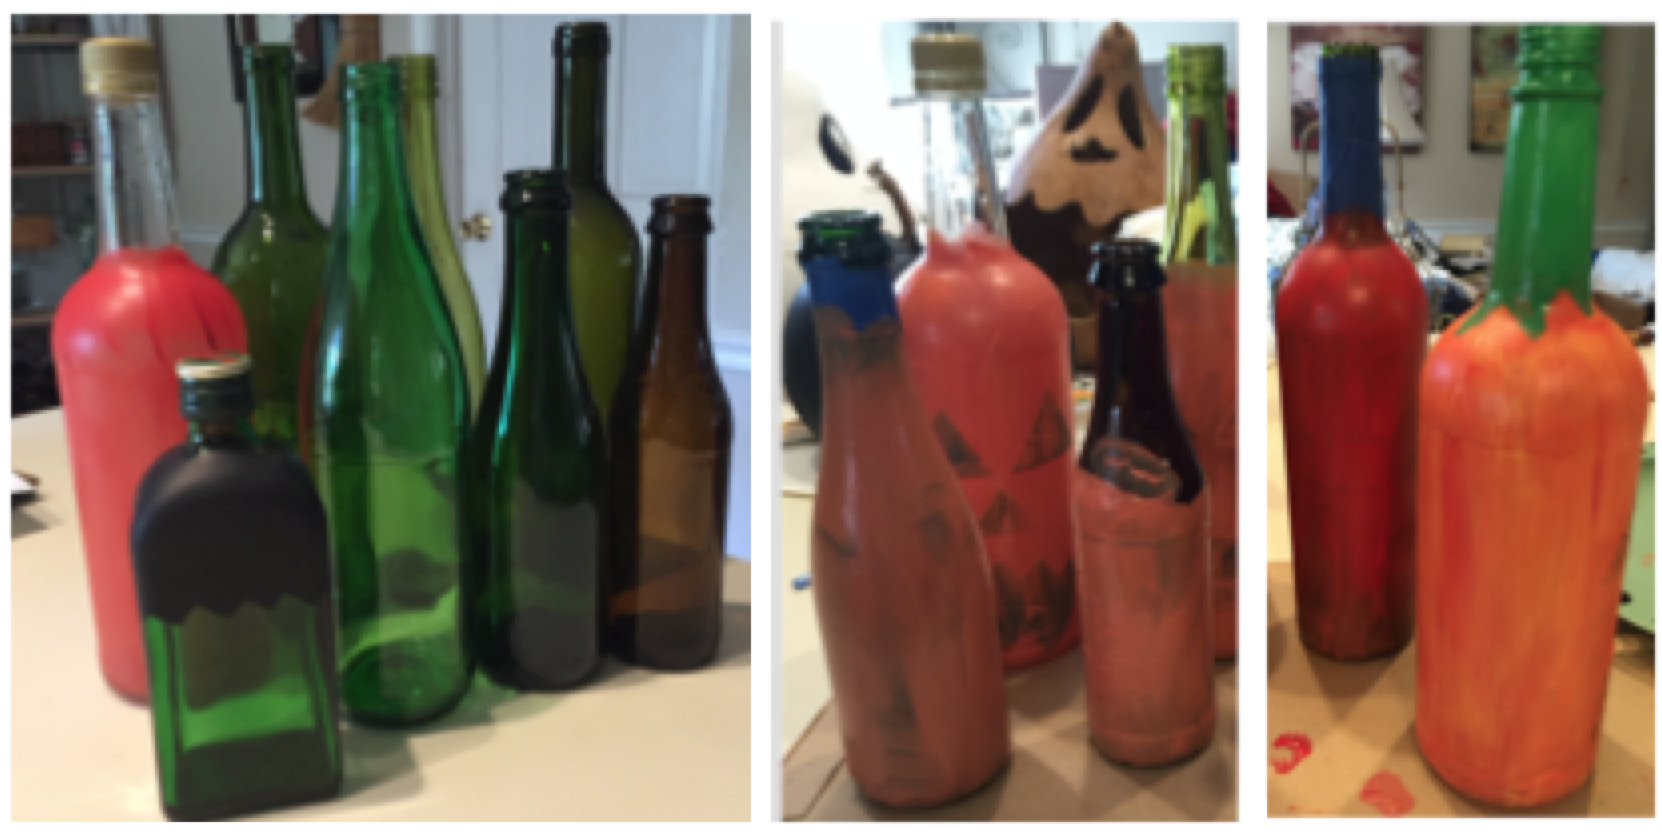
Once you have peeled all of the labels off check the bottles to see if there is any residue. I used Goo Gone to remove the residue because I did not want my paint to have lumps in it.
My boyfriend suggested that I leave the residue so that my pumpkins could have warts. He always makes these kinds of suggestions when he does not want to help with my craft projects. In this case – I only asked for him to get Goo Gone from the garage…but in his defense it was midnight.
The next step is up to you. I tried a few different methods and this is what I thought of them:
Stem:
- Free hand the top of the bottle bottle using acrylic paint
- Tape off the top of the bottle for a clean line — allowing the green glass to serve as the stem
- Depending on what type of lines you want and if “messy” bothers you I would totally recommend this. These lines ended up being the cleanest on my entire project. That being said, I really like things that look clean-cut and neat.
Faces:
- Place tape across the “face” of the bottle. Draw a design on the tape and cut it out with an x-acto knife.
- I did not have an x-acto knife but when I tried this with a utility knife I made a big mess. I did not like my hand drawn designs and decided I was too clumsy to make this work.
- Layer tape and cut out face shapes while leaning on something – in my case cardboard
- This was a disaster. Not only was it really difficult to do but I pushed too hard and the tape ended up stuck to the cardboard when I tried to peel it up.
- Paint a layer and realize you forget to tape a face on and then try to
- This happened because I was so excited to get started. If you do this make sure that the paint underneath is all the way dry – not tacky. When it is time to remove it score around the tape edges with a utility knife. This worked okay — I did it on the clear pumpkin bottle with the painted stem.
- Paint the bottle whatever color you would like and then paint the faces on by hand
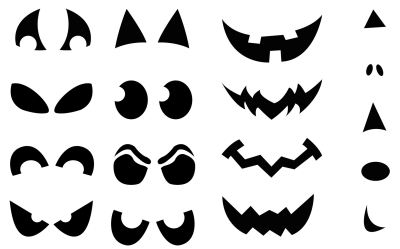
- Once you get over the fact that your lines will not be perfect…hand painting the faces was by far my favorite way to do this! I used a template of faces included below and tried to copy them.
Materials:
- Empty Glass Bottles
- Goo Gone
- Painters Tape
- Utility or X-Acto Knife
- Acrylic Paint (used various cheap brands and the Martha Stewart glow-in-the-dark line)
- PATIENCE
Steps:
- Soak bottles in hot water with soap. Check on them and spin them as needed to ensure that all of the edges are soaked.
- Use Goo Gone to remove any left over sticker residue.
- Decide how you will make your faces/paint your bottles based on the suggestions above.
- I used acrylic paint and waited until the paint dried completely between layers. If you use tape make sure that you score the edges before carefully peeling it from your bottle — acrylic paint will tear off in one big piece if you work too quickly.
These ones were my favorites. The directions for this are not very clear because it all depends on what you want to do with your bottles. If you have any questions about the process feel free to comment below.

Great ideas!
LikeLike